The Download Store

A place to purchase original woodworking plans created by The Kraftsman.

Visit the Store

Login

Share the post →
  • Digg
  • Facebook
  • Mixx
  • Google Bookmarks
  • email
  • LinkedIn
  • Slashdot
              685 views

The Download Store is Open !

WWPLAN_001 Cover Page

Click to Download Sample PDF

It has been a long time coming, but the woodworking plans download store is finally open at the Kyserike Kraftsman!

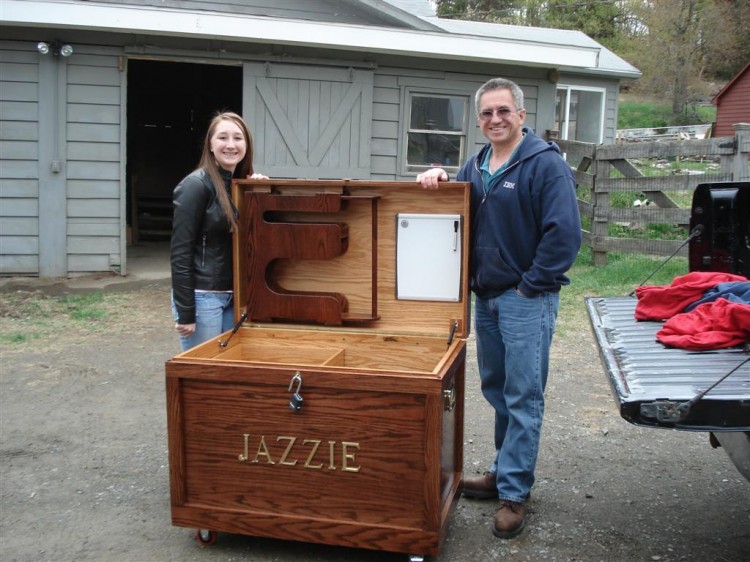
You can now purchase (for a small fee) the plans for a selection of the original woodworking projects that I have documented here on the website. To start, the plans for the tack trunk, grooming tote, and the bandage wrap holder are available for download today!  Plans for the horseshoe pits will be available for download in the very near future.

Each high quality plan includes step by step instructions, a list of material, and detailed drawings to help you create your own woodworking piece.  Visit the downloadable woodworking plans page now to purchase your plans and get started!

Visit the Store
Share the post →
  • Digg
  • Facebook
  • Mixx
  • Google Bookmarks
  • email
  • LinkedIn
  • Slashdot
              1,496 views

The Tack Trunk is Finally Complete !

Delivery Day !

Delivery Day !

I have been working on this tack trunk on and off for over a year, but it’s finally finished and delivered to my daughter who has been patiently awaiting it’s arrival!

I used a red oak stain for the outside of the trunk, but kept the inside of the trunk stained a lighter color so that it would be easier to view the contents in low light levels. I also added multiple coats of a spar urethane as a top coat for protection from the elements.

It has been a long time coming but the end results are worth it. If you are interested in building your own trunk using this design I have plans available for download directly from the website.  Visit the Downloadable Woodworking Plans page.

If you interested in seeing more photos of the finished tack trunk I’ve included a slide show below for your viewing pleasure. Enjoy, and thanks for reading.

Share the post →
  • Digg
  • Facebook
  • Mixx
  • Google Bookmarks
  • email
  • LinkedIn
  • Slashdot
              1,525 views

Work Continues on the Tack Trunk

It’s been quite a while since I have had a chance to devote some time to completing the tack trunk but I finally found a few spare minutes this weekend and have just about completed all the woodworking and it’s now time to start adding the finishing.

The last hurdle that I needed to solve was how to support the lid. It’s heavy, especially when you add the Bandage/Polo wrap holder. I found these shock absorber lifts for a very respectable pride at Rockler and decided to give them a try.

Lift-O-Mat® Gas Spring Lid Support
Effortless opening of doors and lids! Gas springs are the ideal choice for cabinet doors and lid supports that open upward. You’ll get soft and quiet closing, plus smooth motion and stopping. Each set includes two gas springs and four mounting brackets. (Screws not included). Available in Black (Silver shown not available). See chart for more information.

Lift-O-Mat® Gas Spring Lid Support

Lift-O-Mat® Gas Spring Lid Support

The struts worked well for the tack trunk application helping to lift the lid into it’s open position and hold it there securely. It takes a little effort to force the lid to close so I wont be worrying about it closing on anyone’s fingers.

I added a gas strut to each side of the trunk, made sure that the strut didn’t interfere with either the sliding tray or the closing of the lid. I needed to add a 2″x3″ block in each corner of the lid to mount the strut. Here’s a shot of the assembled support.

Left Hand Side Gas Strut

Left Hand Side Gas Strut

Next it’s on to staining and varnishing …. Stay tuned.

Share the post →
  • Digg
  • Facebook
  • Mixx
  • Google Bookmarks
  • email
  • LinkedIn
  • Slashdot
              1,110 views

Bandage/Polo Wrap Holder is Ready for Staining

Completed Wrap Holder ready for staining.

Completed Wrap Holder ready for staining.

I finished assembling the wrap holder this past weekend, sanded it to 180 grit, and it’s now ready for staining.

The wrap holder took much more time than I initially thought it would to create mostly because I had to edge glue three 1/2″ x 6″ oak boards together to make the front and back sides the required width. I didn’t notice until after the glue-up the slight variations in the thickness of each of the boards. My planer isn’t wide enough to send the edge glued assemble through to correct the problem and it was too severe to try and clean up with a hand plane, so I ripped them in half again so they would fit through the planer. After thickness planing the four pieces to the same dimensions I once again edge glued them back together to form the front and back.

Another view of the removable wrap holder

Another view of the removable wrap holder

If I were to make another one of these I would probably look at using plywood rather than trying to edge glue stock hardwood together the way I did as there is quite a lot of waste after making the cutouts in the front and back for access to the wraps.

All in all I’m happy with the results. Now I just have to get up the nerve to stain it!

Share the post →
  • Digg
  • Facebook
  • Mixx
  • Google Bookmarks
  • email
  • LinkedIn
  • Slashdot
              584 views

Working on the Removable Bandage Wrap Holder

One of my co-workers said to me today that he hasn’t received a feed from my website in a while. I guess that means I haven’t made any updates in some time. I’ve got quite a few other things going on, but I do need to complete this tack trunk project and I know you are all waiting to see the final product so I’ll try and step up the pace some :-) .

Bandage Wrap Holder Model

Bandage Wrap Holder Model

I had a small set back in the design of the removable bandage wrap holder and I had to make some adjustments. The width and height of the wrap holder had to be increased to accommodate the storing of 4 standing wraps in the long side of the holder. I also wanted the wrap holder to be stored in the lid of the tack trunk, but didn’t want to have to build some elaborate mechanism to hold it while the lid was closed. After some trials in modeling the design (using sketch-up) I came up with a redesigned wrap holder and securing hardware that I think is very simple and ingenious.

I extended the length of the front and back panels of the wrap holder to create a set of rails that could be used to hold the wrap holder in the lid. To prevent the wrap holder from moving side to side while stored but to also allow it be be secured and removed easily I added an oak strip to the left side side of the lid support. This strip acts as a stop when securing the wrap holder in the lid. In this oak strip I will inset some rare earth magnets and have some corresponding screws added to the wrap holder so that the magnets will keep the wrap holder from sliding out of the support mechanism.

Tack Trunk Model with wrap holder

Tack Trunk Model with wrap holder

I’m currently assembling the wrap holder using the new design I should have it ready for staining by the end of the weekend. Stay tuned (I promise the next update will be more timely).

Page 1 of 41234